Facial lymph drainage: technique, benefits and complete guide
A fresher complexion, relaxed features, reduced puffiness... Everything you need to know about lymphatic drainage for the face, using the right techniques and the right tools.
Lymphatic drainage of the face is as popular in specialist surgeries as it is in home beauty routines. But what can you really expect from it and how can you practise it effectively?
Behind this well-being technique lies a precise physiological reality. Facial lymph drainage is not an ordinary cosmetic treatment: it is a technique that acts directly on your body's fluid regulation system. Understanding how it works means knowing how to use it more effectively.
Understanding the role of the lymphatic system
Before we talk aesthetics, let's talk physiology. The lymphatic system is a discreet but absolutely essential network. It transports lymph - a liquid rich in white blood cells - which helps to eliminate cellular waste, toxins and excess fluids produced by tissue activity.
What makes it special? Unlike the blood system, it has no central pump like the heart. It depends entirely on movement, breathing and mechanical stimulation to keep going. When it slows down, the signs quickly appear - and it's often the face that gives them away first.
Morning puffiness, persistent bags under the eyes, a dull complexion, less-defined features... These signs can indicate a slowdown in lymphatic circulation. Lymphatic drainage of the face is specifically designed to relaunch this natural circuit, guiding accumulated fluids towards the lymph nodes where they will be filtered.
The facial lymphatic drainage circuit
The lymphatic system has no central pump: massage is its driving force.
Facial lymph drainage: what exactly is it?
This is a gentle manual technique involving light, slow, rhythmic pressure. The aim is not to «knead» in depth as you would with a muscle massage, but to guide the lymph towards its drainage areas: the lymph nodes located mainly in the neck and collarbones.
Unlike toning massages, the pressure is superficial. Pressing too hard would crush the lymphatic capillaries just beneath the skin and block the desired effect. It is the lightness of the gesture that makes it so powerful.
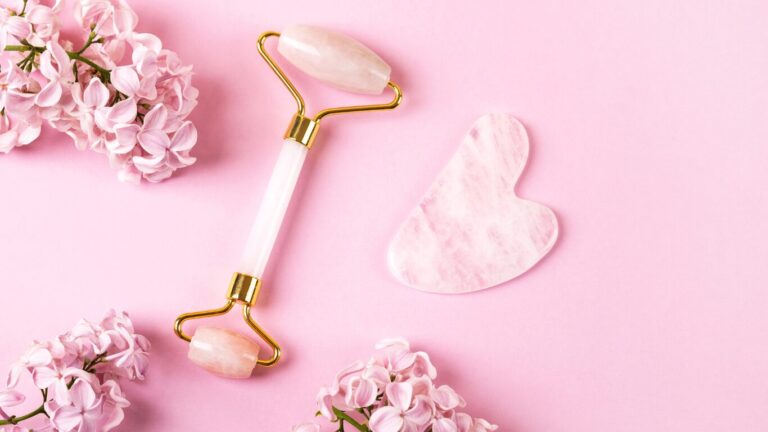
Lymphatic drainage of the face can be carried out in several ways: in an office with a trained beautician, or as a self-massage at home using your own hands or specific tools such as the gua sha, facial maderotherapy tools or the face lymphatic drainage brush for greater precision and consistency.
The real benefits: what to expect and what not to expect
It is important to provide an enlightened look. Facial lymph drainage is not a surgical facelift. However, it can produce visible and lasting effects - especially on faces prone to water retention and swelling.
The before-and-after results are often spectacular on faces prone to oedema. Cheeks appear higher, the oval better defined, bags under the eyes significantly reduced. By reducing the excess fluid accumulated in the tissues, the face regains its natural contours, luminosity and apparent tone.
✅ Recorded profits
- Reduced puffiness and swelling
- Improved radiance of the complexion
- Temporarily sharper facial contours
- A feeling of lightness and freshness
- Relieves tension in the jaw and neck
- Possible improvement in certain inflammatory conditions
- Optimised absorption of skincare products applied afterwards
✗ What you shouldn't promise
- Does not remove deep wrinkles
- Not a substitute for cosmetic surgery
- Does not alter bone structure
- Its effect is cumulative - regularity is essential
- Purely aesthetic studies remain limited
Facial lymph drainage diagram: understanding the meaning of the movements
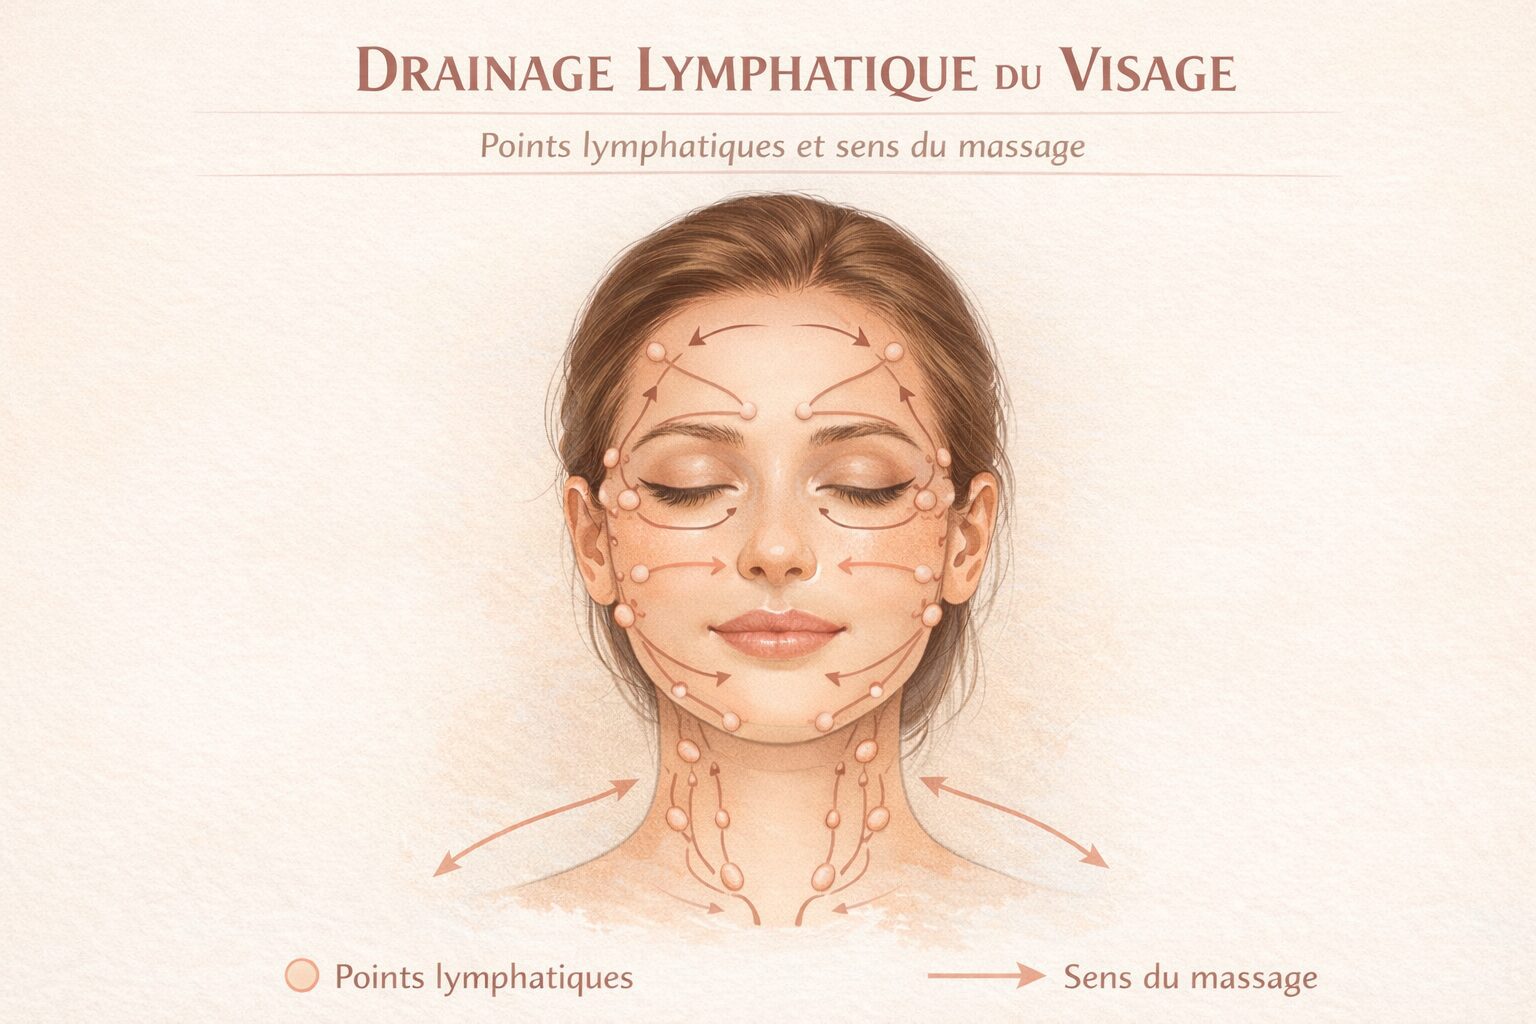
If you're practising at home, it's essential to visualise the lymph's pathway. The basic rule is simple: drainage is always from the inside to the outside of the face, then downwards, and finally towards the lymph nodes in the neck and collarbones.
Never pull downwards from the middle of the face. First, aim outwards - towards the ears and temples - before moving down the neck towards the collarbones. This two-stage approach ensures effective drainage.
The right gestures, above all
Open palm
Use the flat part of your hands, not your fingers. The palm covers more surface area and stimulates the lymphatic vessels better.
Light pressure
The skin should be gently stretched, not the muscles. If you feel the muscles, you're pressing too hard. Stay on the surface.
Stretch & release
The movement is back and forth: the skin is gently stretched in one direction, then allowed to return. This rhythm creates the lymphatic pump.
Rules for directing massage
- Always drain from swollen areas to healthy areas
- Prepare the armpit before applying facial fluids
- Muscle warmth = better absorption of drainage
- Regularity > intensity
The 11 steps of face and neck lymphatic drainage
Carry out these steps in order. Each step prepares you for the next. Allow around 15 to 20 minutes for a complete protocol. Apply a light oil or serum to the face before starting to make gliding easier.
Step by step
11 steps - 15 to 20 minutes - On oily skin
Deep breathing acts like an internal pump that activates the lymphatic network. Place your palms on your stomach. Inhale slowly through your nose until you feel your belly rise. Exhale gently through your half-open lips, as if blowing out candles, until your belly returns to a flat position.
↺ 5 breathsBefore draining the face, the lymph nodes in the armpit must be «emptied» so that they are ready to receive the displaced fluids. Place your opposite palm in the hollow of the armpit. Apply gentle pressure upwards and inwards. Release the pressure. This is a gentle, rhythmic pumping action.
↺ 10 to 15 times - each armpitPlace your hand flat on the collarbone. Gently stretch the skin down the chest, then gradually guide it towards the armpit. This movement cleanses the circuit between the neck and the main drainage area.
↺ 10 to 15 timesPlace your hand on the front of the neck, where you feel the swelling. In small successive glides, gently stretch the skin towards the collarbone, then towards the lower chest. This link between the neck and the chest is an essential part of the drainage process.
↺ 10 to 15 timesPlace one hand flat on the side of the neck. Stretch the skin towards the back of the neck, then downwards. This side-to-side massage stimulates the cervical lymph vessels, which play a key role in facial drainage.
↺ 10 to 15 times - each sidePlace both palms on the back of your neck, just below your hairline. Stretch the skin towards the spine, then down the back. This gesture frees up the back vessels, which are often neglected.
↺ 10 to 15 timesThe fingers remain flat, in constant contact with the skin. There is virtually no pressure - you are moving the skin, not the muscles. Each gesture is always directed outwards, towards the ears, then downwards towards the cervical lymph nodes.
7a - The front
Place both index and middle fingers flat on the centre of the forehead, just above the eyebrows. Gently stretch the skin away from you towards the temples, as if you were unfolding a sheet of paper. At the temples, pause slightly and gently pump - press and release - the temple-ear area. Move up a notch to the middle of the forehead, then to the hairline: the same gesture at each level, from the centre to the temples.
↺ 8 to 10 times per level7b - Eye contour
Place index fingers under eyebrows, inner corners. Glide very gently towards the outer corners of the eye, then towards the temples. Never pull upwards or downwards - only outwards. Then go under the eyes: from the inner corner to the outer corner, then towards the temples. The skin under the eyes is very thin - the pressure should be minimal, almost imperceptible.
↺ 6 to 8 times - upper then lower contour7c - Cheeks
Place both palms flat on either side of the nose, fingers pointing towards the ears. Stretch the skin of the cheeks outwards, towards the cheekbones and then the ear. The movement follows the natural line of the cheekbones. Move down a notch below the cheekbones and repeat: from the centre of the face towards the ears.
↺ 10 to 12 times per level7d - The sinuses and wings of the nose
Place your index fingers on either side of the sides of your nose. Make a small downward glide, then turn towards the cheeks in the direction of the ears. This relay helps to drain the sinus areas, which are often congested.
↺ 8 times7th - Upper lip, chin
Place the index fingers under the nose, in the centre. Slide towards the corners of the mouth, then towards the ears. Then move down under the lower lip, to the centre of the chin: the same route to the corners of the mouth, then to the jaw and ears.
↺ 8 times per level7f - The jaw - relay to the neck
Place your palms on either side of your jaw. Stretch the skin towards the back of the jaw, in the direction of the ears and submandibular ganglia. When you reach the ear, gently guide the gesture downwards along the neck to the collarbone. This movement closes the facial circuit: everything that has been mobilised is directed towards the cervical lymph nodes.
↺ 10 to 15 timesIn the event of swelling inside the mouth, a very gentle massage can be given according to your therapist's instructions. Hands must be impeccably clean.
You finish where you started. This last pass at the base of the neck closes the circuit and ensures that all the fluids coming up from the face have been guided towards the collarbone and the healthy lymph nodes.
↺ 15 times on each side«Well-conducted drainage doesn't work on the muscles - it transmits to the skin and it's the skin that talks to the vessels.»Basic principle of manual lymphatic drainage
Why integrate specific tools?
The use of professional accessories transforms a simple self-massage into a precise and effective ritual. They provide even pressure, better stimulation of superficial tissues, less hand fatigue and, above all, a regularity of movement that makes all the difference over time.
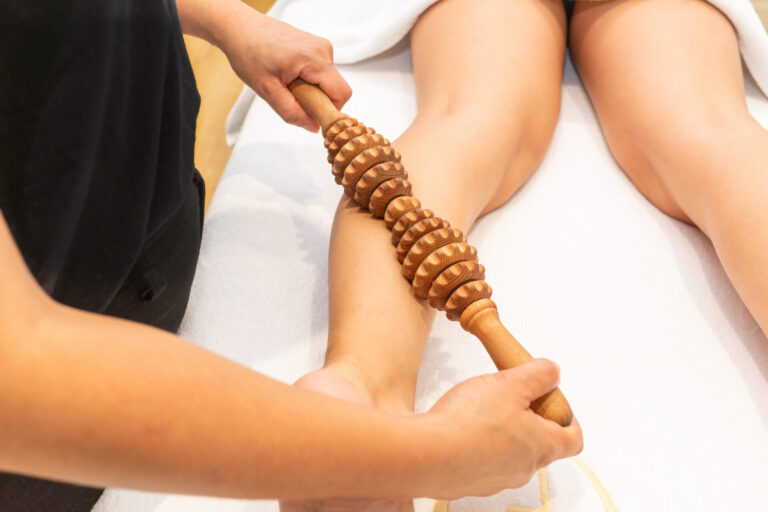
Maderotherapy tools
Wooden kit to accompany and amplify the facial massage steps. Ideal for professional protocols.
Discover →Gua sha & rollers
Stone or crystal tools for delicate areas of the face. Perfect for draining the cheeks and jawline.
Discover →Face lymphatic drainage brush
Specific fibres to gently stimulate the hair without damaging it. Ideal for a morning routine on dry skin.
Discover →How often should you use it and who should benefit from it?
The key is consistency. A 15-minute drainage every day is much more effective than a long weekly session.
In institutes
Every 2 to 4 weeks, or intensive monthly treatment.
At home
3 to 5 sessions a week. Regularity is more important than intensity.
Intensive treatment
10 consecutive days to initiate deep drainage.
Find your moment: under a warm shower (the heat relaxes the muscles and improves the receptiveness of the tissues), in the morning when you wake up to deflate before going out, or as the start of your facial skincare routine. Take a breath. Take this time as a space for yourself.
Who is this treatment for?
Lymphatic drainage of the face is suitable for a wide range of profiles: people prone to water retention, dull or tired complexions, recurring bags under the eyes, post-cosmetic surgery support (with medical validation) and professionals wishing to enrich their protocols with a treatment based on physiology.
Important contraindications
Certain situations contraindicate drainage and require prior medical advice.
🚫 Do not massage if...
- Pain or discomfort during the procedure
- Possible signs of infection (heat, redness, fever)
- Open wound, cut or canker sore in the area
- Scar less than 3 weeks old
- Surgical staples or clips still in place
- Unexplained or sudden-onset swelling
⚠ Prior medical opinion
- Risk of thrombosis
- Severe heart failure
- Active infection in the treated area
- Unexplained or sudden-onset swelling
Everything you need to know
Lymphatic drainage of the face is an invaluable ally in reducing swelling, smoothing and brightening the skin. It does not transform bone structure, but optimises the circulation of fluids. Properly performed, with the right gestures and the right tools, it becomes a genuine natural sculpting ritual.
| Aspect | Key information |
|---|---|
| Main objective | Stimulate lymphatic circulation, reduce water retention and swelling |
| Visible results | Brighter complexion, reduced puffiness, temporarily better-defined oval, sensation of lightness |
| Pressure required | Light and superficial - only the skin, never the muscles |
| Recommended tools | Hands, maderotherapy tools, face lymphatic drainage brush, gua sha |
| Ideal frequency | 3 to 5 times a week at home or in a salon |
| Main contraindications | Active infection, thrombosis, severe heart failure, unexplained swelling |
| Profiles concerned | Water retention, dull complexion, persistent puffiness, post-cosmetic surgery, professionals |